Create an app with authentication
Learn about building authentiaction in app for accessing the api.
This guide will walk you through the process of creating an app in the App Registration Portal and add authentication in it. Follow these steps to get started.
Step 1: Log In
Log in to the App Registration Portal using your tenant admin credentials. Only tenant admins have the necessary permissions to create applications.
- Click the orange "Sign In" button
- If your tenant is configured to use use SSO then input your email address, click next, and follow your standard SSO login flow
- Alternatively, you can click "Use account to login" and type in your tenant URL instead. If your tenant is configured with SSO, it will still follow your standard SSO login flow
- If you are bypassing SSO with a direct logon, you will want to be signed into tenant before attempting to access App Reg. Click "Use account to login" and type in your tenant URL
Multi-tenant supportAt the bottom of the App Reg page, you can click 'Sign into another tenant' and follow the login instructions above. You can see and edit all of the apps that have been created on all of the tenants you are signed into.
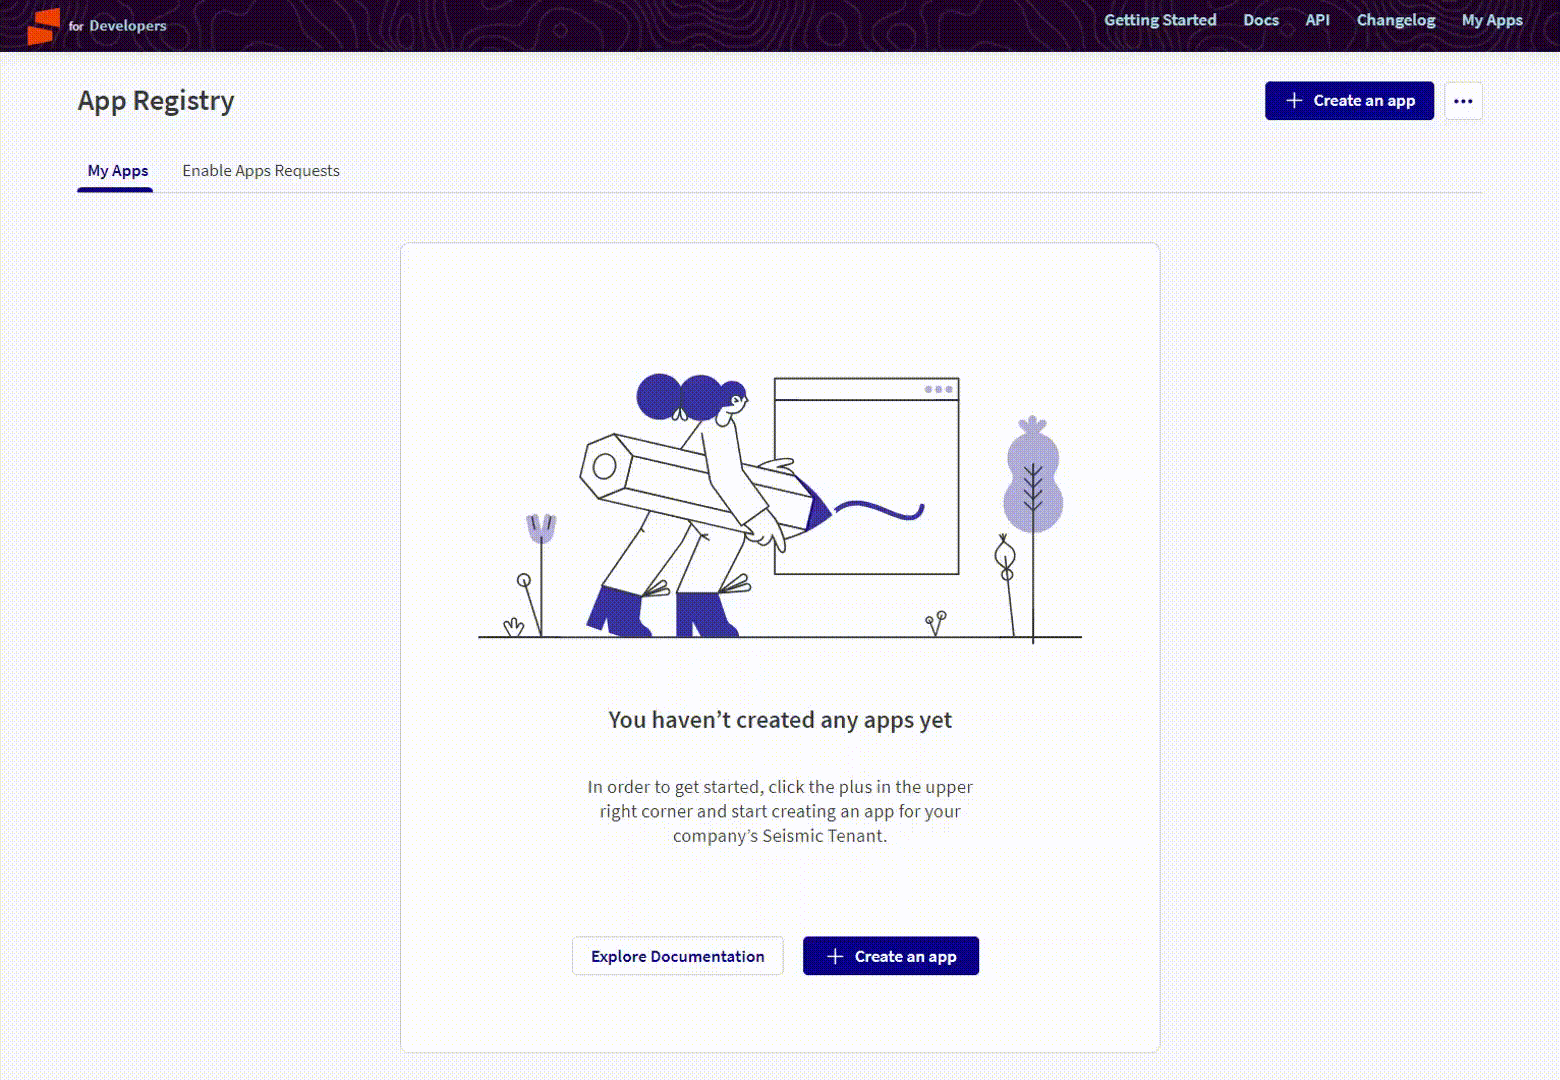
Step 2: Create a new app
- Click + Create an App button to launch create app modal.
- Enter the App Name. The
Create appbutton in the modal will get enabled on focus out from App Name field. - Click
Create appbutton on the modal.
Step 3: Set up an authentication client
If you are building an app which requires access to Seismic apis then you'll have to setup authentication in your app. This will generate the oAuth authentication client.
The authentication is turned off by default. Enable the toggle to see all available authentication options. Skip the section if app has no need to call any Seismic api.
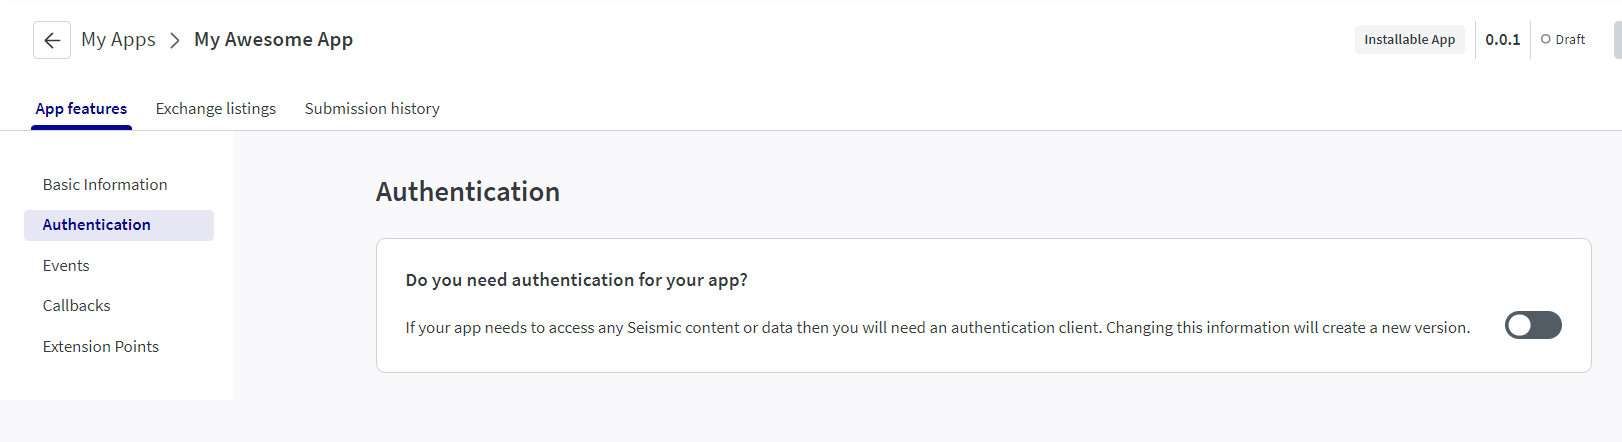
Once enabled, you can select one of the 3 supported OAuth flows depending on the type of app you are creating.

If your app requires user authentication then you can use one these two flows.
OAuth2 - Authorization Code Flow (User Authentication)
Use this if you have an UI and a backend server available.
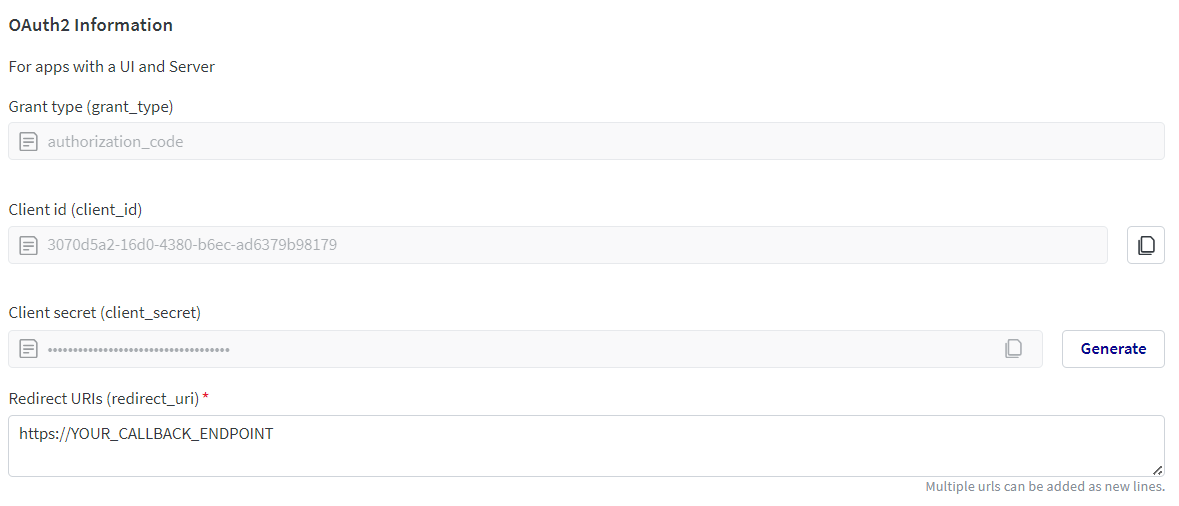
Redirect URIs: This is the endpoint on your server where Seismic's auth server will send the authorization code after a successful login. You can add multiple redirect URIs here, one per line, but only one of them should be sent in the OAuth flow.
Client Secret: Generate the client secret by clicking the Generate button. This client secret should be used to exchange the code for a token in the OAuth flow.
Refer to the Authorization Code Flow documentation to learn about getting token via this flow.
OAuth2 - Implicit Flow (User Authentication)
Use this if you only have a single page application without a backend server.
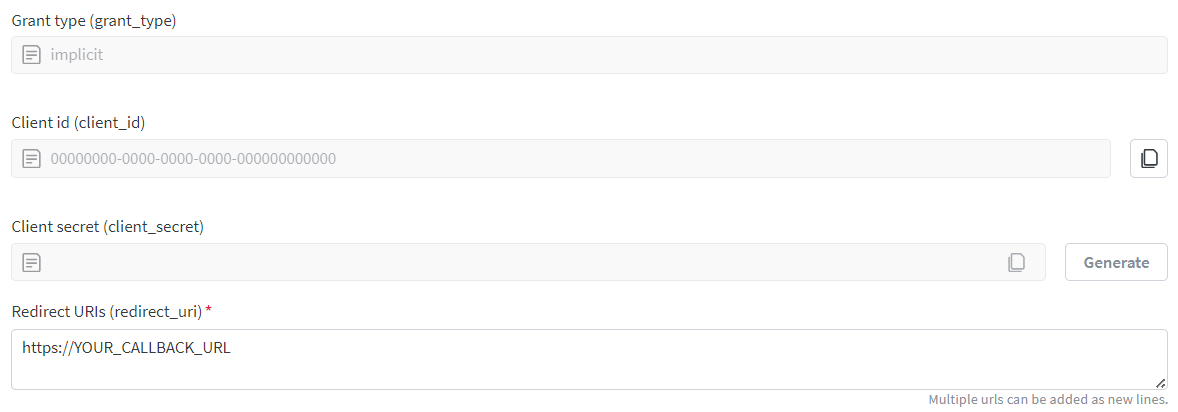
Redirect URIs: This is endpoint on your client page where Seismic's auth server will send the access token after a successful login.
Client Secret: Client secret is not required for Implicit flow.
Refer to the Implicit Flow documentation to learn about getting token via this flow
If you looking to setup an automated workflow where user login is not possible, or looking to do a machine to machine communication, then use the client credential flow.
OAuth2 - Client Credentials (User Delegation)
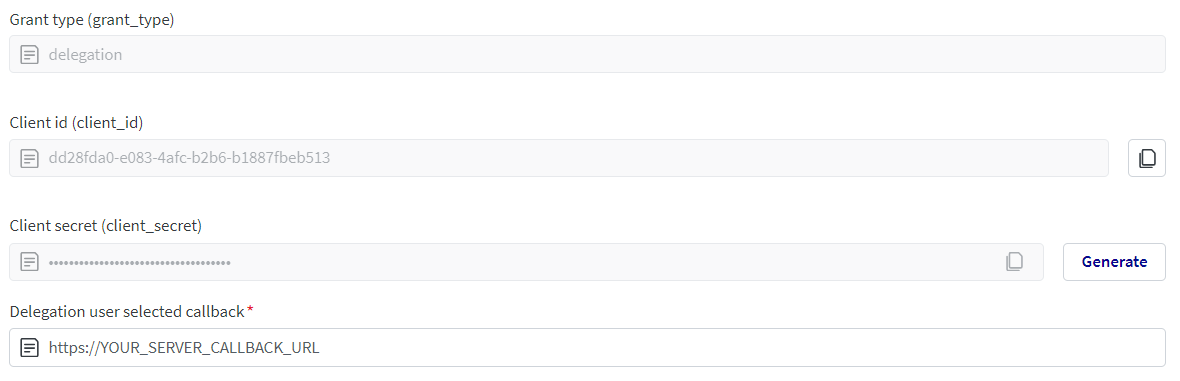
Client Secret: Generate a client secret which will be required for token generation.
Delegation user selected callback: This is endpoint on your server where Seismic will notify with delegated user id, whenever the delegation user is set or changes on the installed app by the tenant admin. Your server must save this user for the tenant, as the user id is required for token generation.
Use delegation for automated processesWhen building an automated process like background jobs, where capturing user input for authentication is not possible, use delegation grant type.
Refer to the Client Credential User Delegation flow documentation to learn about getting token via this flow.
Step 4: Select scopes for your auth client
In order to access the api, you need to add the scopes on your auth client. To find out what scope you would need look at the particular API's documentation page.
Once you have decided the required scopes for your app, select them in your app.
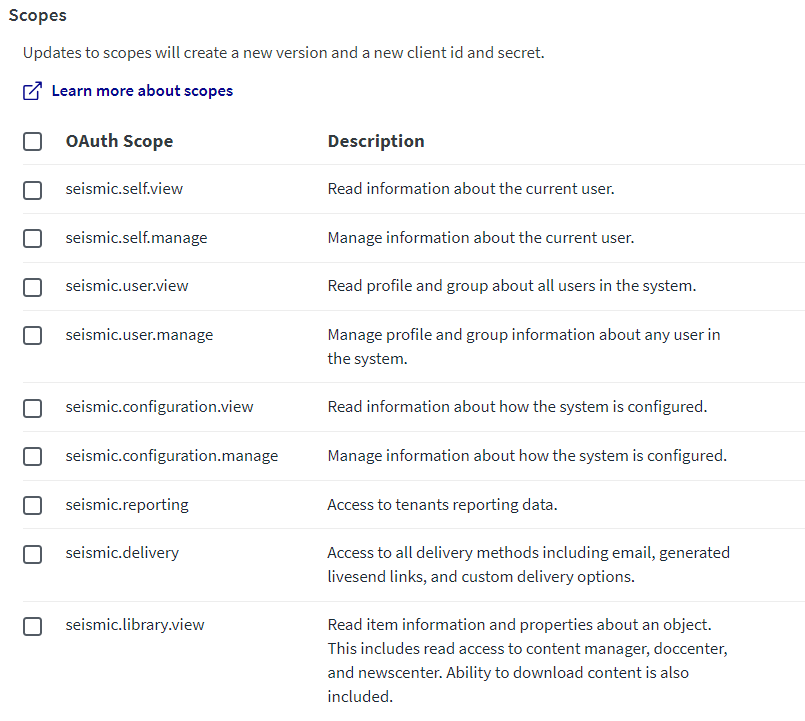
Save the app after selecting the scope.
Modifying scopes changes the client idAdding or deleting scopes creates a new version of the app with a new client id. This is to ensure that existing integrations using the old client does not break.
Step 5: Install and enable the app on your tenant
At this point the app will be automatically installed on your tenant. All you need to do is to enable it.
Test on other tenants?
You can distribute your app to other tenants using the distribution link. It is a common practice for tenants to build and test app between their sandbox and main tenant.
Refer App Distribution to learn about various ways to distribute apps.
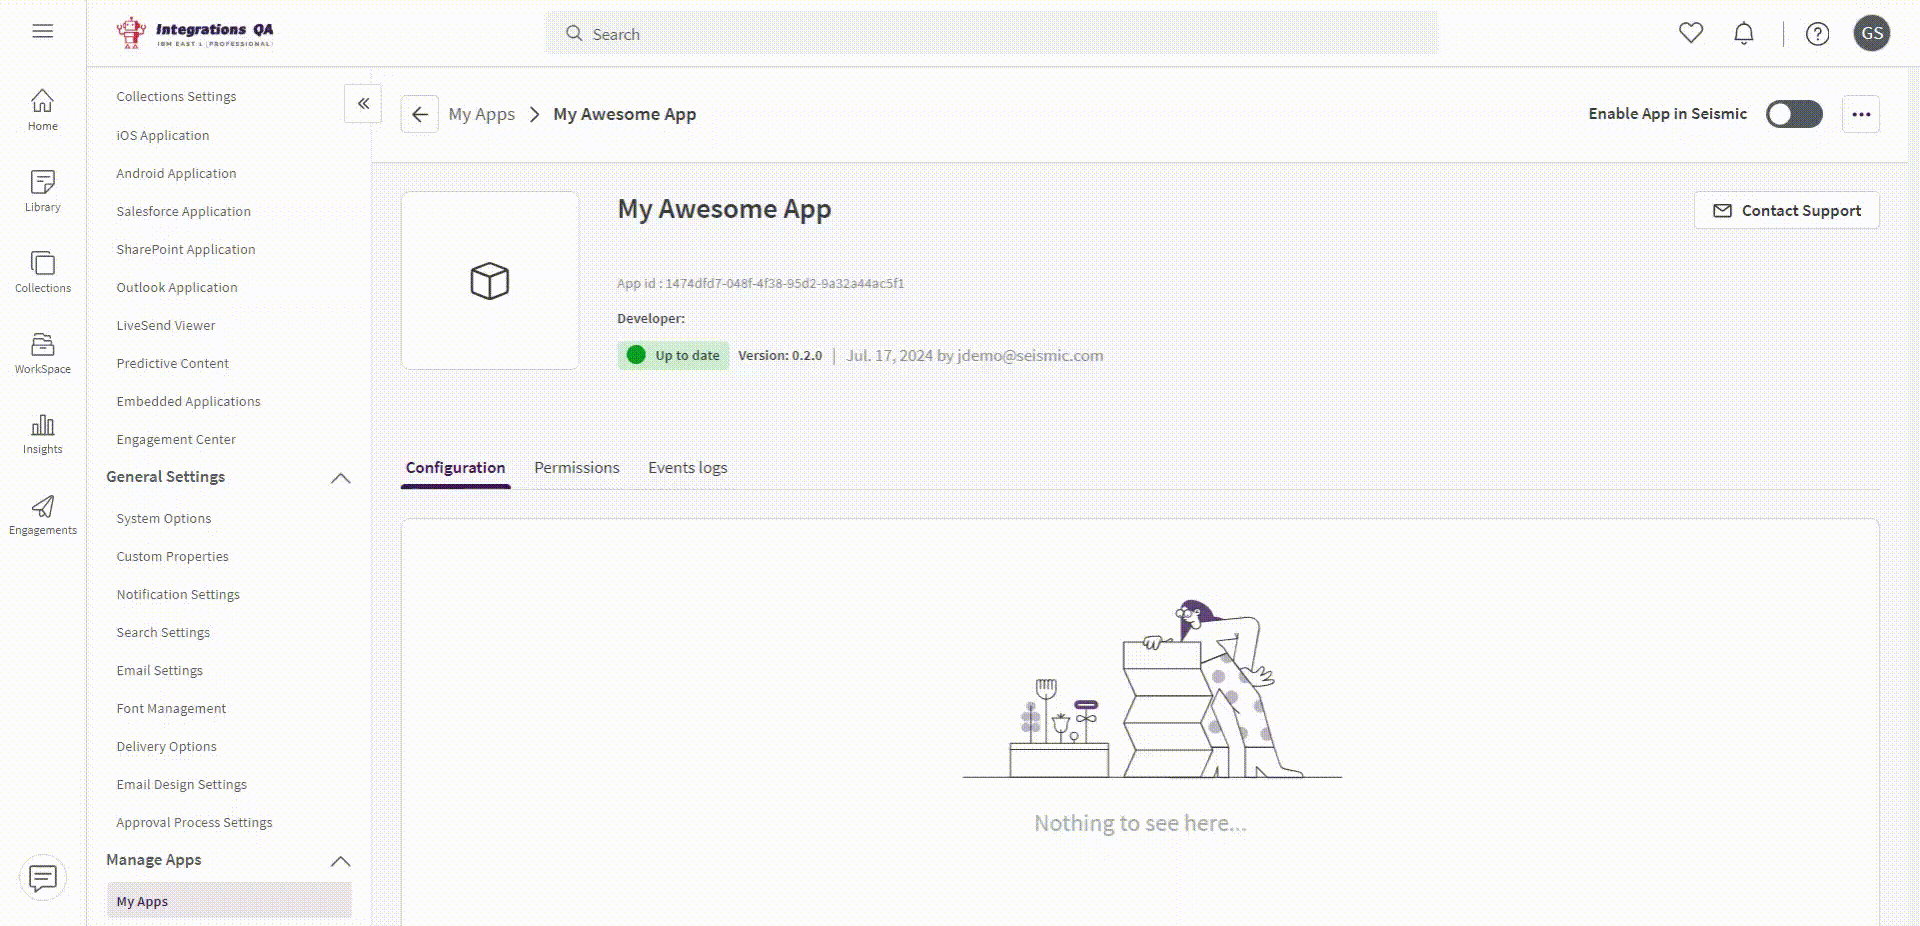
Go to Seismic Web, Admin Settings ➜ My Apps and find your app.
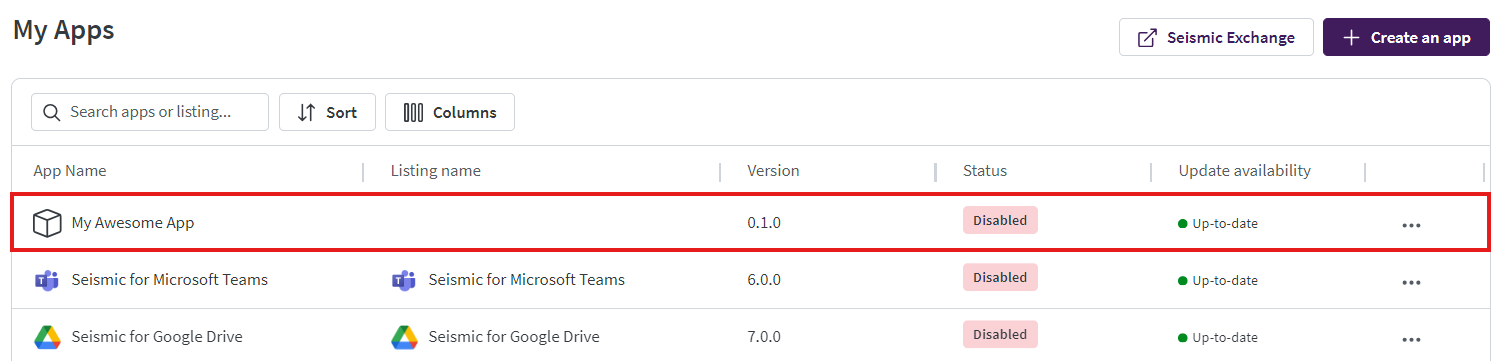
Click on the row to open the app configuration page.
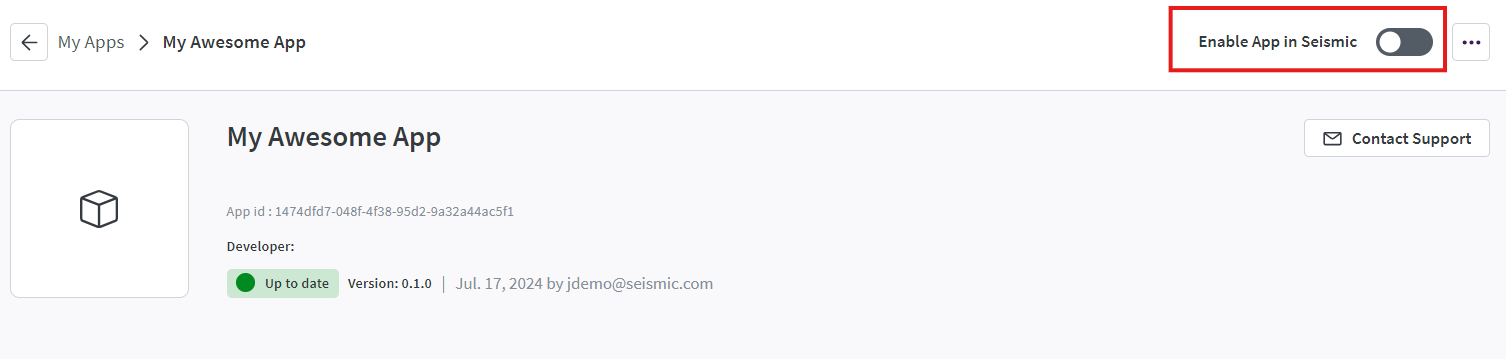
On app configuration page, click on Enable App in Seismic to enable the app. This will prompt a consent modal, accepting which will enable the app on the tenant.
If your authentication type is User Delegation, then an additional delegation user picker will appear in the consent modal. You must select a user here in order to enable the app. Once the app is enabled, the token can be generated on behalf of this delegated user.
Your app is now ready now ready for building integrations with the public apis.
See Authentication Overview to learn about api authentication.
...
App Reg is not for configuring app installations on your tenantIf you want to install, uninstall, enable, or disable apps on your tenant, this is done by your tenant administrators in Admin > System Settings > My App
Once your app is created, you will have the ability to modify it's configuration
Updated 22 days ago