How to connect to Seismic's Remote MCP Server with Postman
This guide explains how developers can connect Postman to the Seismic MCP Server. This MCP setup enables secure authentication through Seismic and provides access to tools such as Generative Search for building AI-powered experiences.
Seismic's MCP Server is currently in PilotPlease contact your account team if you would like to get access!
Prerequisite - AuraIt is currently required to have Seismic Aura to access the tools and features within our MCP server
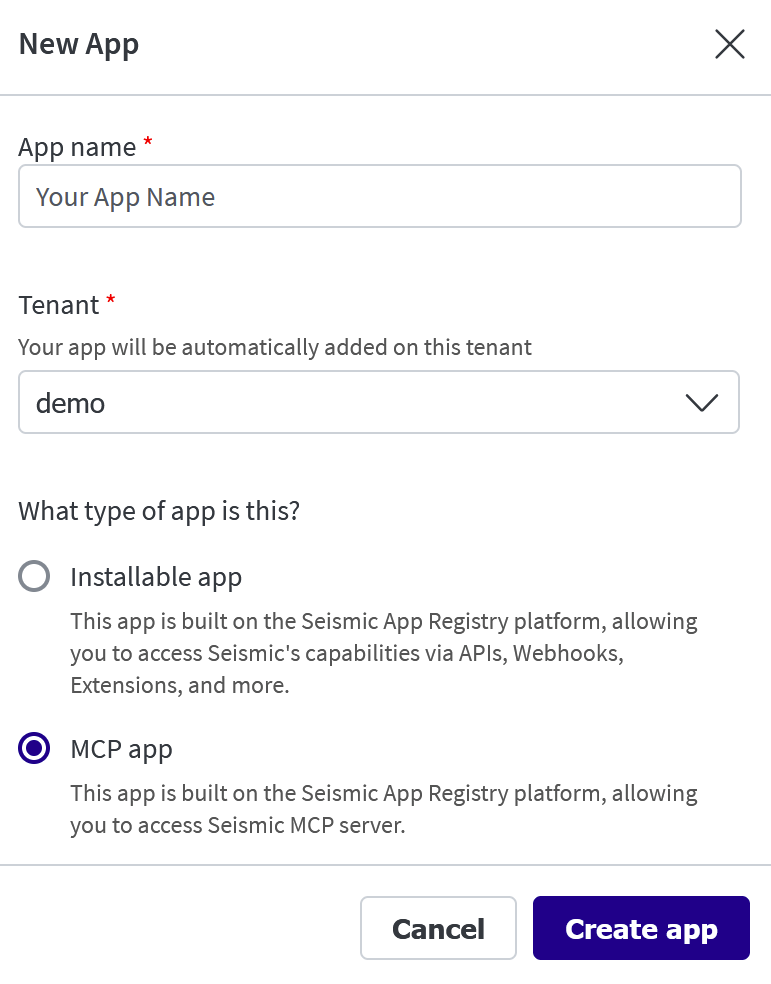
Step 1: Create an App in Seismic App Registry
- Sign in to apps.seismic.com with your Seismic account.
- Click on Create App button.
- Enter an App Name, Select MCP app as type click Create app.
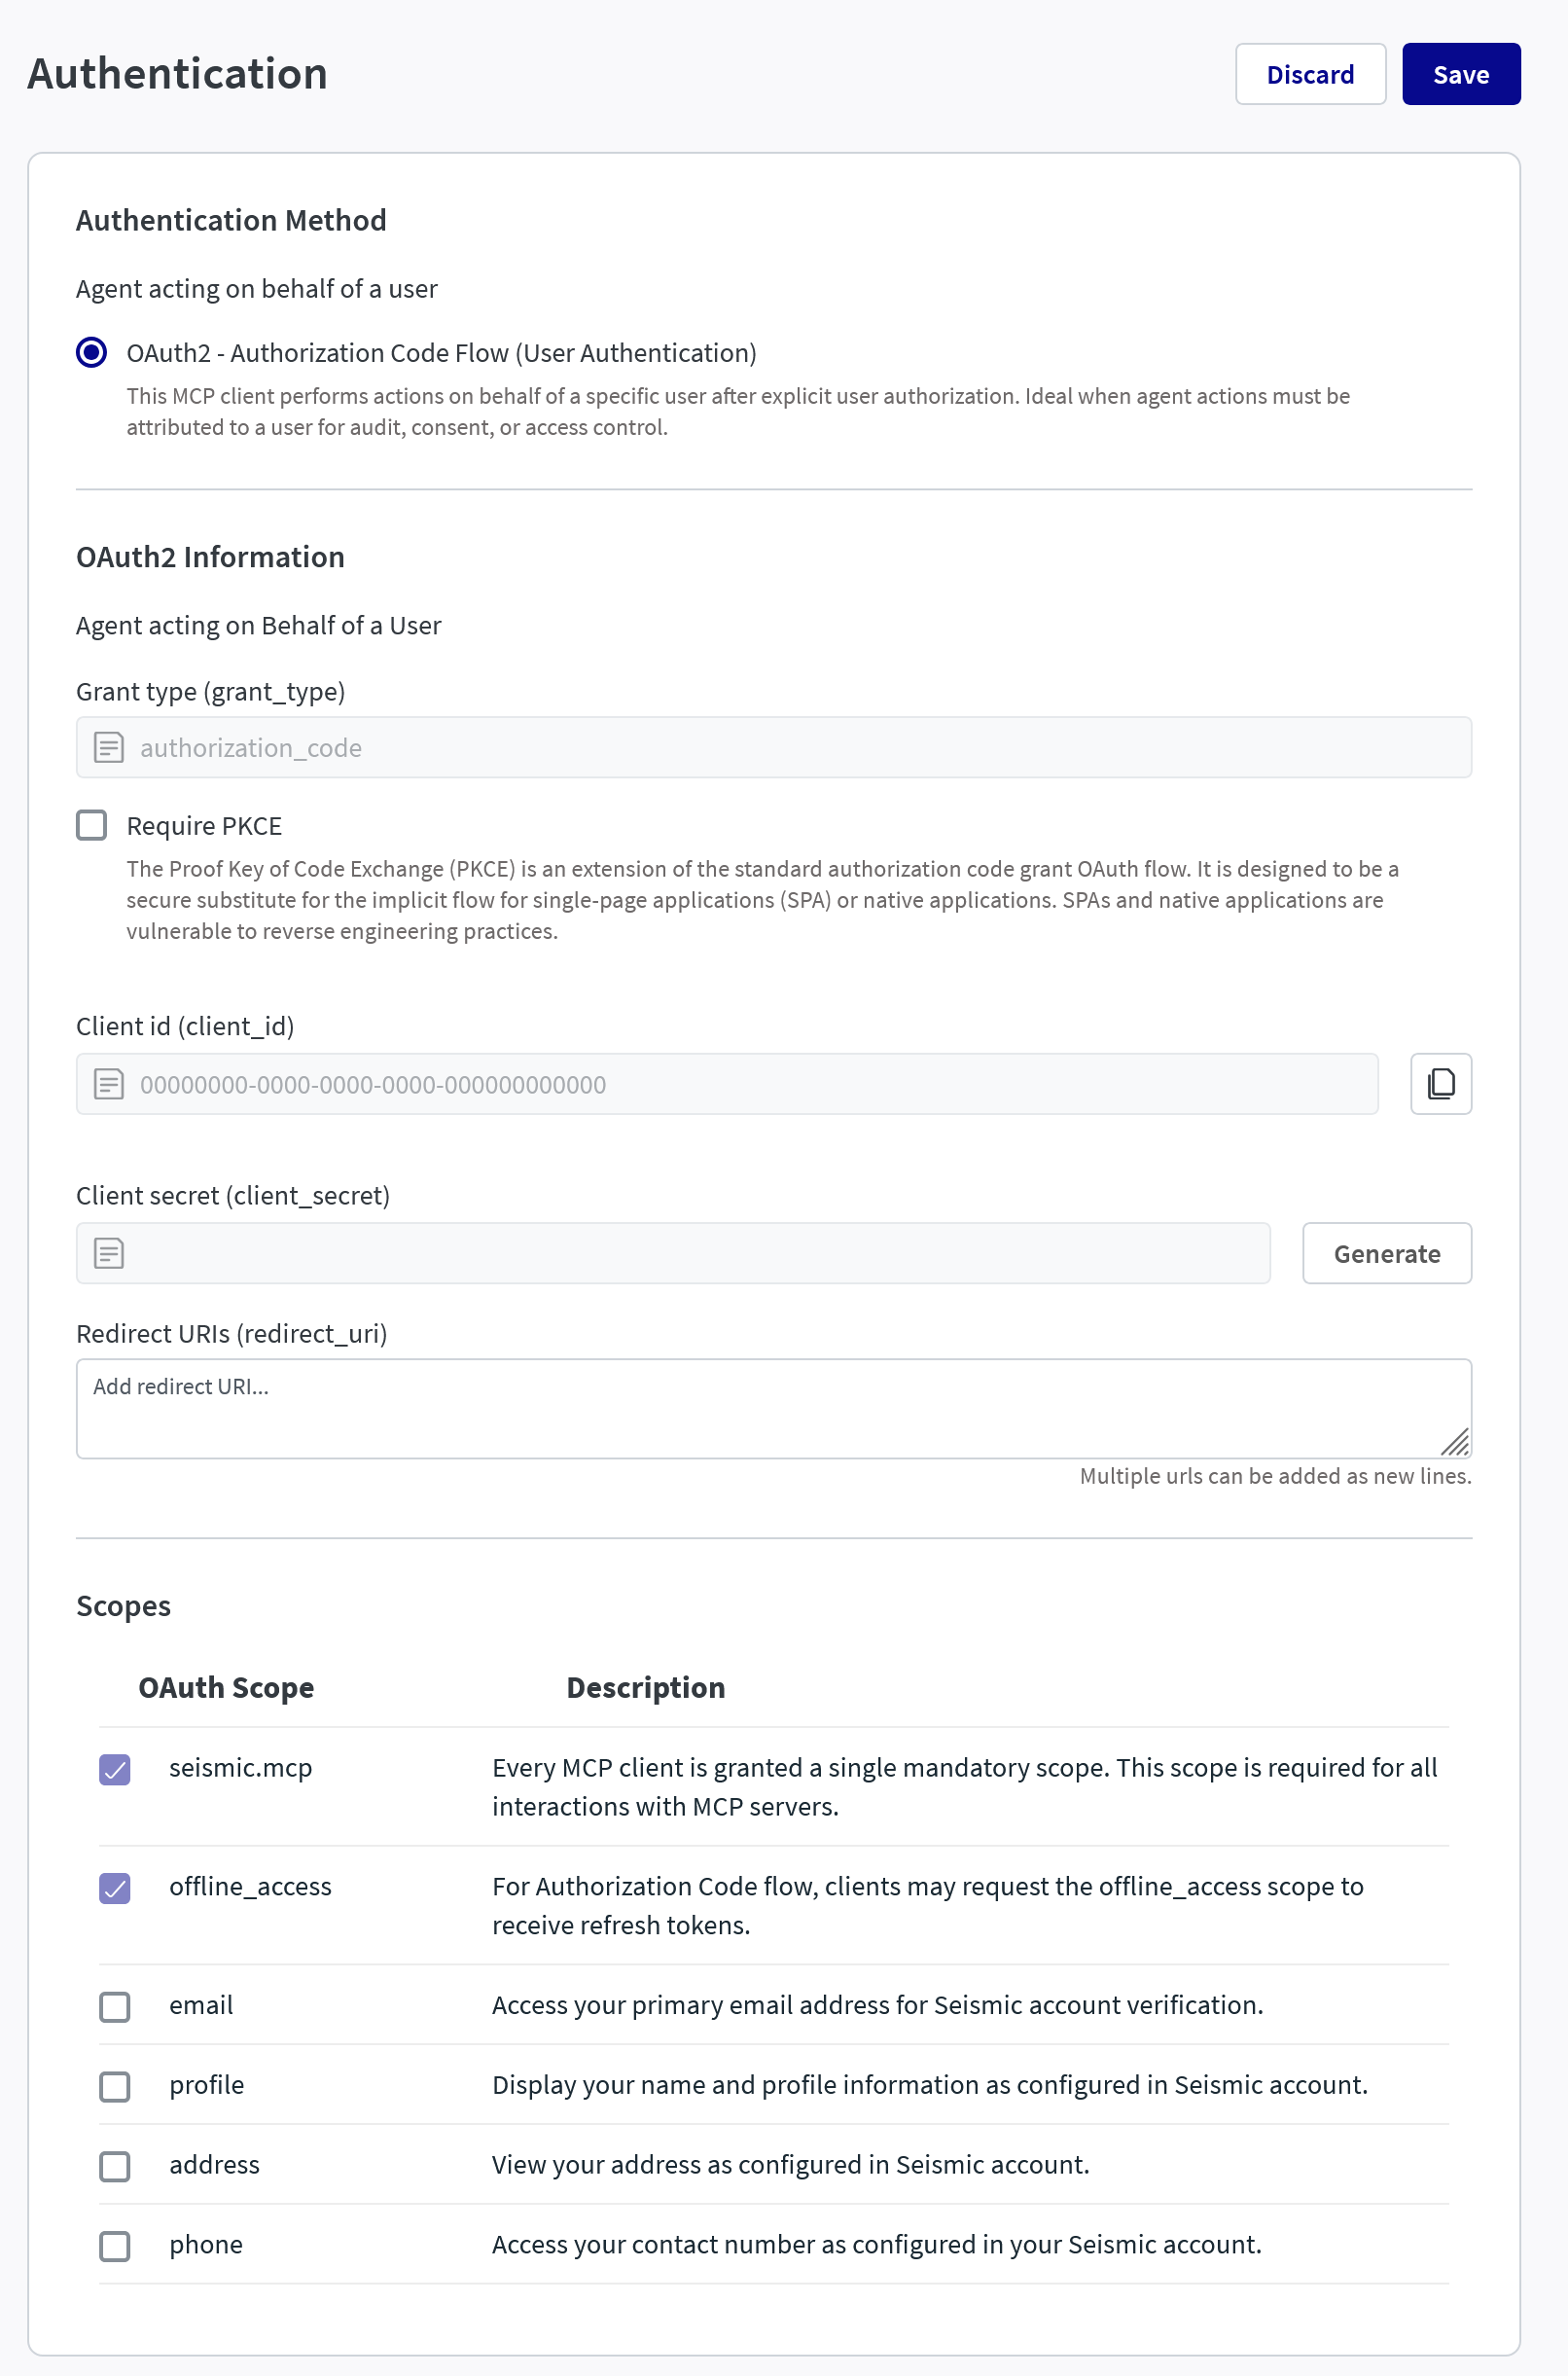
Step 2: Configure OAuth Client (Auth Code + PKCE)
- Turn on Authentication and select OAuth2 - Authorization Code Flow
- Check Require PKCE
- For callback/redirection URIs use https://oauth.pstmn.io/v1/browser-callback
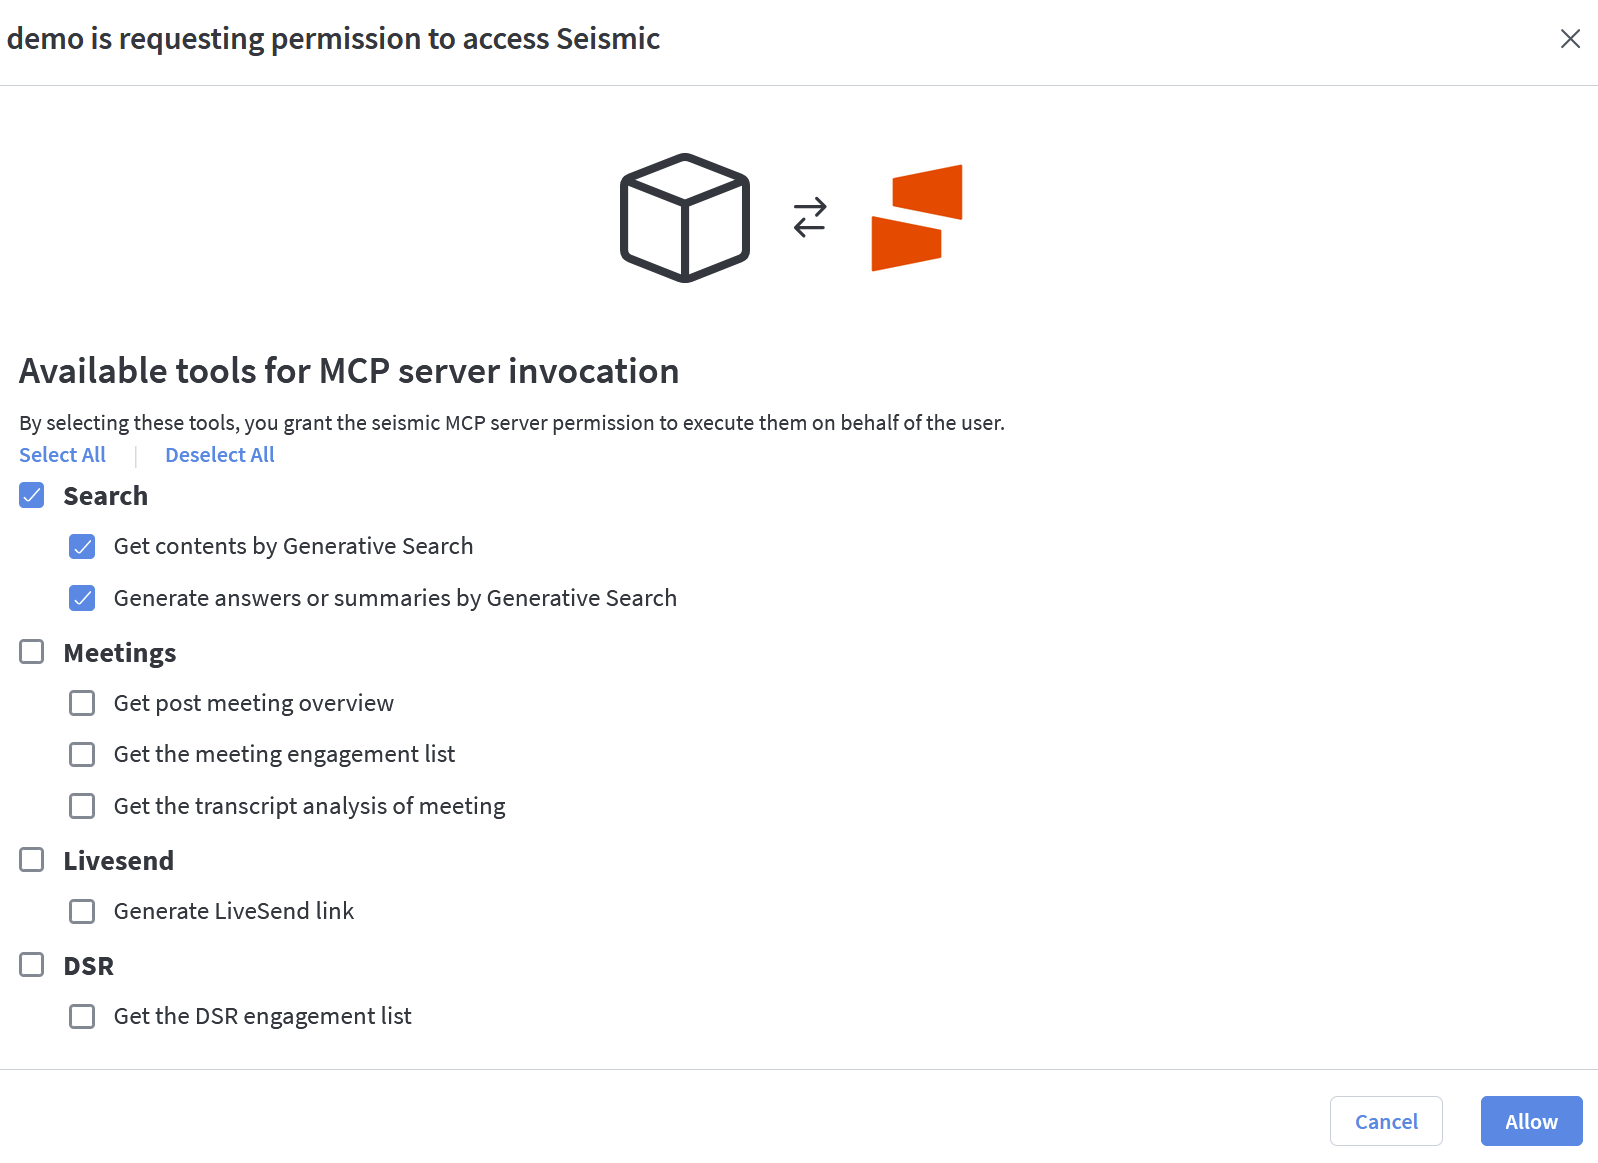
- Pick the scopes needed to access MCP Tools.
- Ensure you have generated a client secret
Supported scopesOnly seismic.mcp scope is supported and is be selected by default. Optional OIDC connect scopes can be selected.
Step 3: Enable the App
Find the app in your tenant and enable it.
- Go to
System Settings→My Apps - Open your app and enable it.
(Optional) To share the app with another tenant:
- Copy the Distribution / Install Link from the app page.
- Provide this link to admins of other Seismic tenants so they can install it in their own tenant.
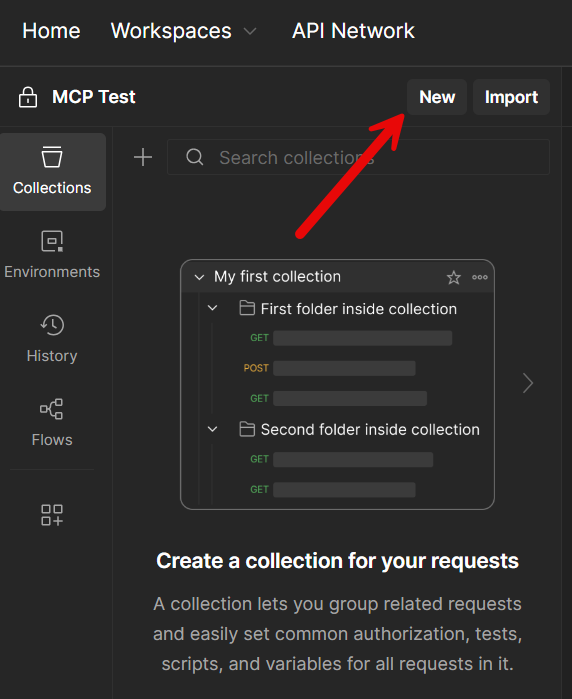
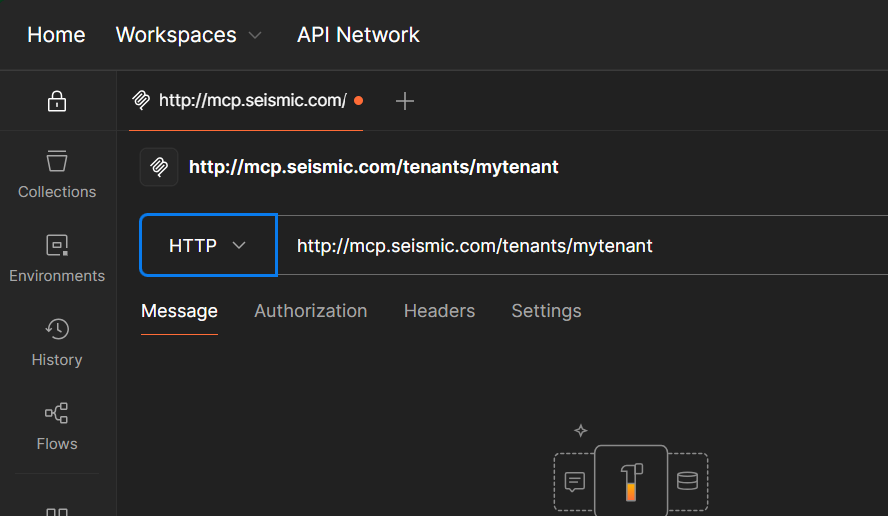
Step 4: Configure Postman
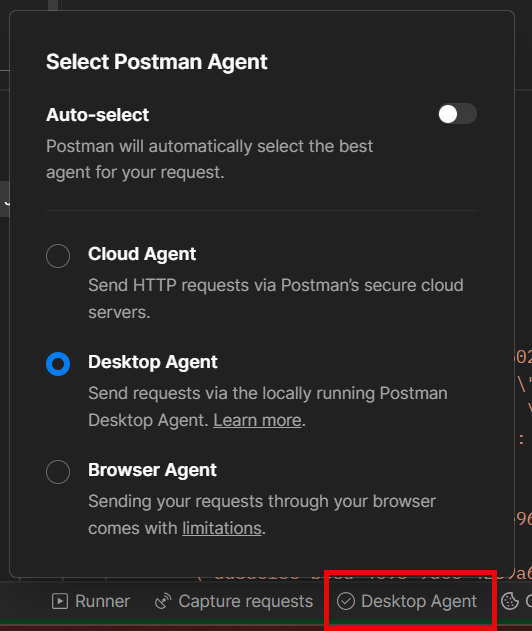
Postman Desktop Agent is Required
From within a Workspace, click New
Select MCP
Change the Request Type to HTTP and input the Seismic MCP Server URL specific to your Tenant: <https://mcp.seismic.com/v1/tenants/{tenantname}>
In the bottom right, ensure Postman is using the Desktop Agent to send calls
Configure Authentication to match the Authentication configuration from the app you created in Step 2
-
Auth Type = OAuth 2.0
-
Configure New Token
-
Token Name = (any name you want)
-
Grant Type = Authorization Code (With PKCE)
-
Validate that the provided Callback URL = https://oauth.pstmn.io/v1/browser-callback
- If it does not match this, please go back to step 2 and input the value that Postman has provided into your Seismic App's Auth Callback URL
-
Auth URL = https://auth.seismic.com/tenants/{tenantname}/connect/authorize?
- Ensure you replace {tenantname} with your tenant subdomain value, just like you did in the MCP URL
-
Access Token URL = https://auth.seismic.com/tenants/{tenantname}/connect/token#a
- Ensure you replace {tenantname} with your tenant subdomain value, just like you did in the MCP URL
-
Client ID - Copy/paste from your Seismic App's Auth configuration page
-
Client Secret - Copy/paste from your Seismic App's Auth configuration page using the copy button in Seismic's UI

-
Scope - Paste in the scopes you have selected in your Seismic App's Auth configuration page. These should be space delineated
- example:
seismic.search seismic.gen-search
- example:
-
Ensure you save your configuration
Step 4: Authenticate, Connect, and Test!
Click the button for 'Get New Access Token'
- A pop-up window appears, asking you to sign into your seismic tenant. Complete this flow
- After authentication is successful, click the button for 'Use Token'

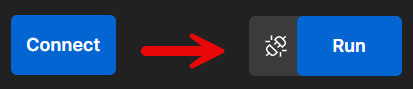
With your new token in place, go back to the top and click the Connect button

If authentication was successful, the Connect button now switches to Run
Go the Message tab to see the MCP Tools you can access
- Clicking into a tool shows you the inputs for that tool. You can input a value and click Run
- The tool's response appears in the Response tab
Updated 21 days ago