
How to connect Seismic's Remote MCP Server to IBM watsonx Orchestrate
This guide explains how developers can connect IBM Orchestrate to the Seismic MCP Server. Once configured, Orchestrate can authenticate with Seismic using OAuth, obtain authorized tokens, and invoke MCP tools such as Gen Search inside skills, automations, and digital worker flows.
Prerequisite - AuraIt is currently required to have Seismic Aura to access the tools and features within our MCP server
Step 1: Create an App in Seismic App Registry
- Sign in to apps.seismic.com with your Seismic account.
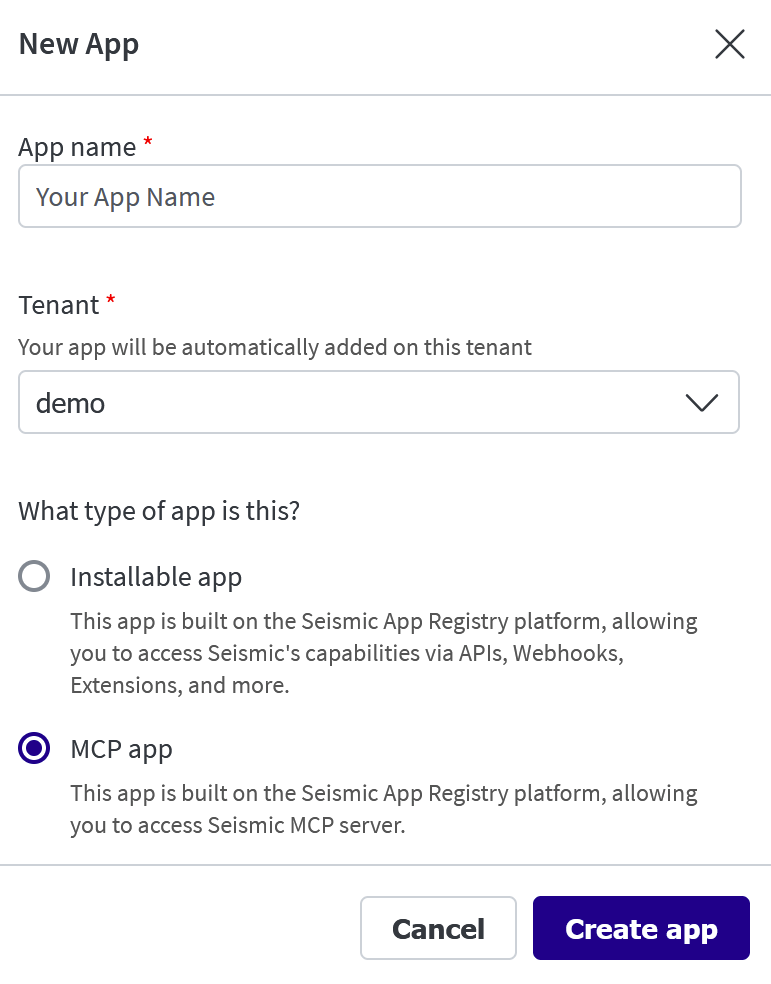
- Click on Create App button.
- Enter the App Name, Select MCP app as type click Create app.
Step 2: Configure OAuth Client (Auth Code)
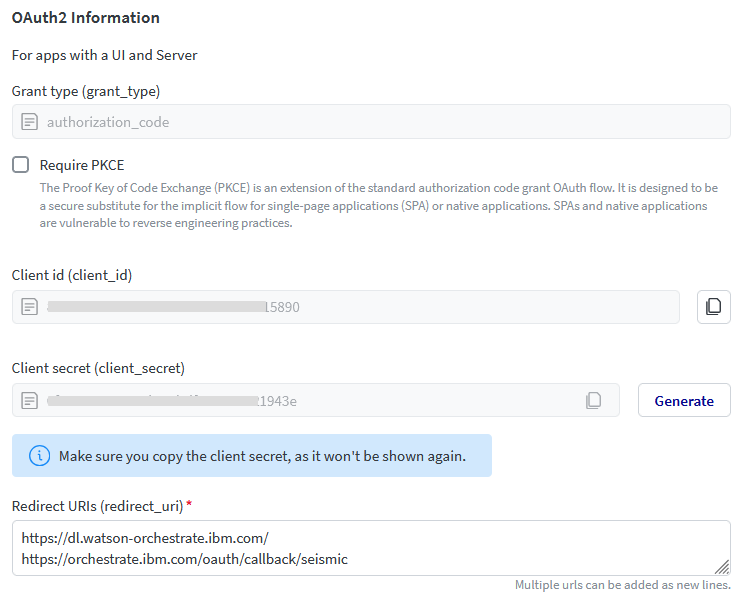
- Turn on Authentication and select OAuth2 - Authorization Code Flow
- Do not enable Require PKCE. watsonx Orchestrate does not support PKCE and authenticates with a client secret instead, which you generate further down in this step.
- Enter the callback/redirection URIs for the Orchestrator connection. More info found here: Authentication types in IBM Orchestrate
NoteWhen using the OAuth2 Authorization Code flow, the callback URL must be configured in the application where you obtain the Client ID and Client secret.
The callback URL format:
{env_url}/mfe_connectors/api/v1/agentic/oauth/_callback.For example, If your watsonx Orchestrate environment URL is https://dl.watson-orchestrate.ibm.com/, then the callback URL is: https://dl.watson-orchestrate.ibm.com/mfe_connectors/api/v1/agentic/oauth/_callback.
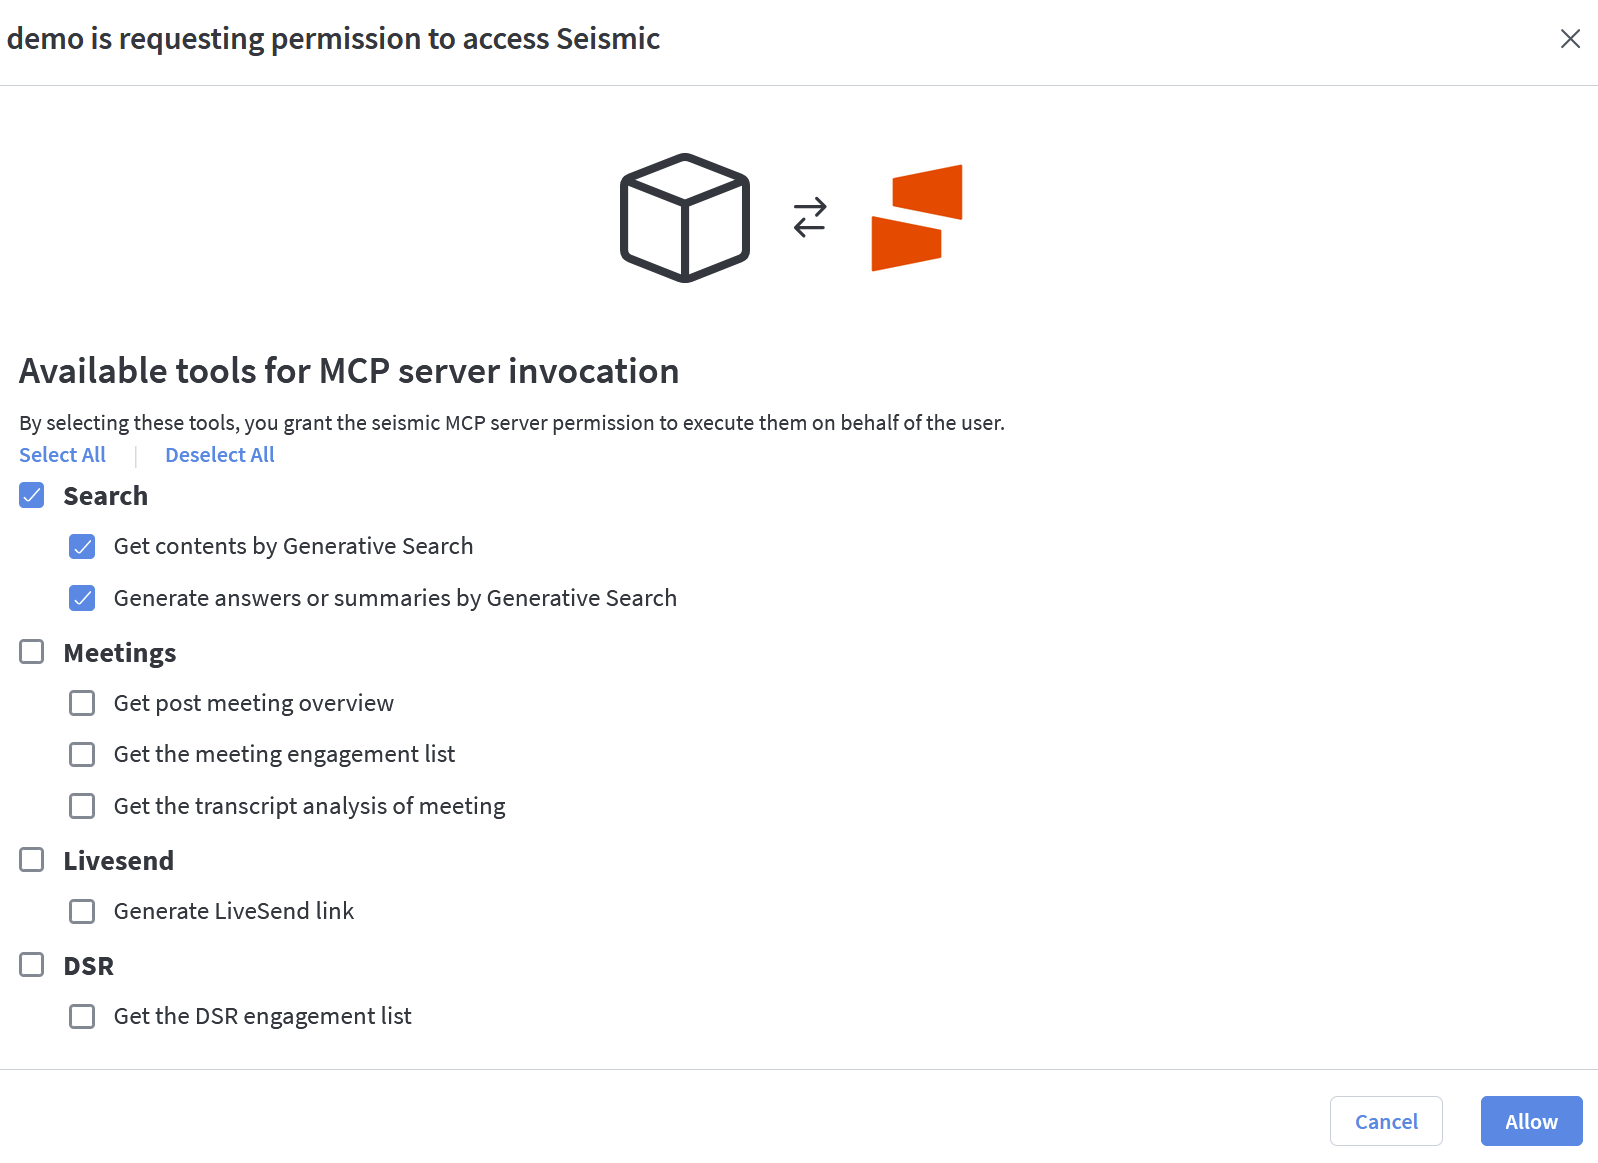
- Pick the scopes needed to access MCP Tools.
- seismic.mcp - It should be selected by default
- Generate the client secret by clicking the Generate button. Copy it immediately.
Step 3: Enable the App
Find the app in your tenant and enable it.
- Go to
System Settings→My Apps - Open your app and enable it.
(Optional) To share the app with another tenant:
- Copy the Distribution / Install Link from the app page.
- Provide this link to admins of other Seismic tenants so they can install it in their own tenant.
Step 4: Add Connection in IBM Orchestrate
- Click through the main menu to access the Connections settings page: Manage → Connections
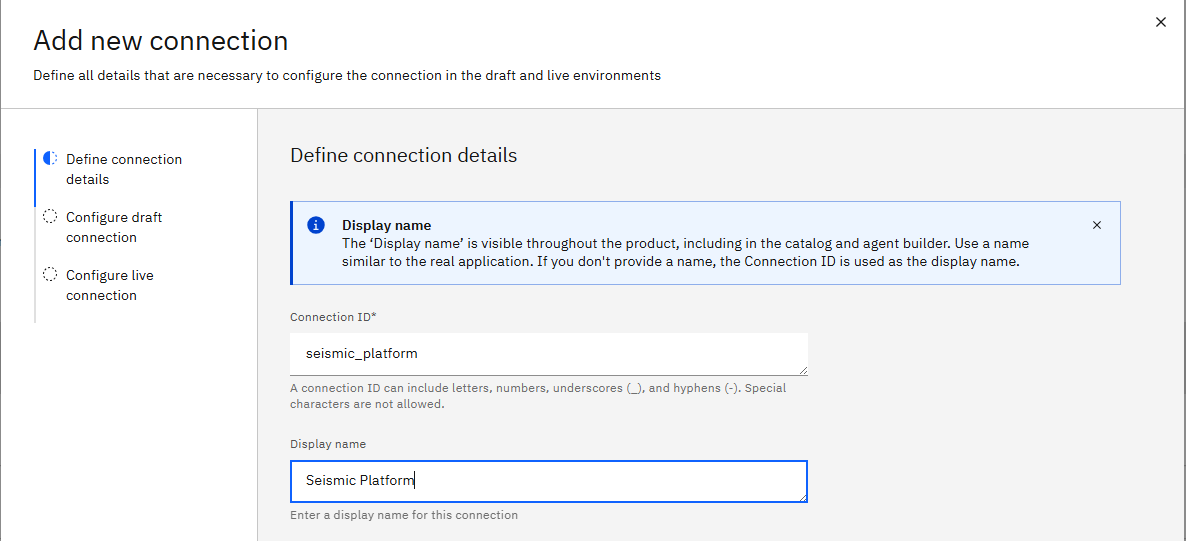
- Click Add new connection + to begin adding a new connection
- Add the connection id and display name (step 1) then click Save and continue
- Choose authentication type of "Oauth2 Authorization Code"
- Fill in the connection details as follows:
- Server URL → Leave blank
- Token URL →
https://auth.seismic.com/tenants/{tenant_name}/connect/token- replace{tenant_name}with the tenant name you use to access the Seismic platform - Scope →
seismic.mcp(other scopes may be added depending on the capabilities needed) - Authorization URL →
https://auth.seismic.com/tenants/{tenant_name}/connect/authorize- replace{tenant_name}with the tenant name you use to access the Seismic platform - Client ID → Use the client ID generated in step 2 above
- Client Secret → User the client secret generated in step 2 above
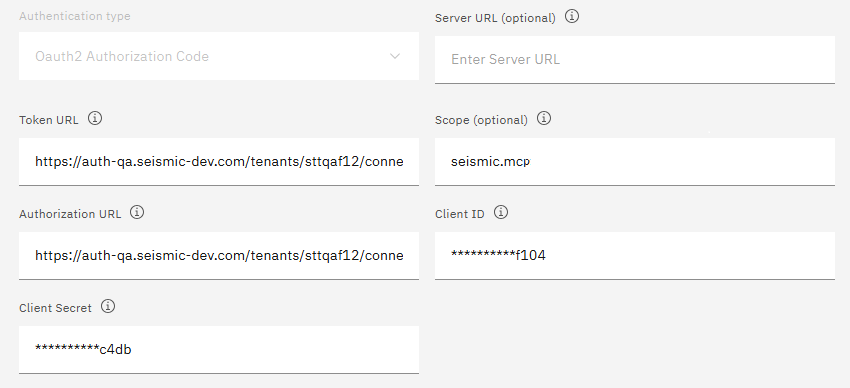
- Change Credential type to "Team credentials" for now and test using the "Connect" button.
- Click next and on the "Configure live connection" step click "Paste draft configuration" to copy the same configuration from the previous step.
NoteSetting the credential type to "Team credentials" is an intermediate step needed to add the MCP server via the ADK tools.
It should be changed back to "Member credentials" after the MCP server has been created in the following steps.
Step 5: Add the Seismic MCP server to IBM Orchestrate
Install IBM's ADK https://developer.watson-orchestrate.ibm.com/
- Follow the instructions on: https://developer.watson-orchestrate.ibm.com/getting_started/installing to setup and activate your environment. Note that at the time of writing the windows version of the ADK does not work for remote MCP server. Use a Linux or macOS install.
- Obtain the service instance URL to use below by going to your profile → settings and then click on the API details page.
- The command below will ask for your wXo key which you can obtain by clicking the "Generate API key" button on the API details page.
- The command you need to run should end up similar to this:
orchestrate env add -n qa -u https://api.dl.watson-orchestrate.ibm.com/instances/xxxxxxxx-xxxx-xxxx-xxxx-xxxxxxxxxxxx --activate- Once your environment has been activated you can add the MCP server using the following command. The -a parameter is the connection name from Step 4 and should be changed if you used a different connection id. See the IBM documentation for additional details: https://developer.watson-orchestrate.ibm.com/tools/toolkits/remote_mcp_toolkits#using-streamable-http
orchestrate toolkits import -k mcp -n seismic_mcp_tools --description "Seismic MCP Server" -u https://mcp.seismic.com/v1 --transport "streamable_http" --tools "*" -a seismic_platform
The connection used above must have a recently updated Team credential in order to add the MCP server.
Step 6: Add the Tools to your agent
- Select the agent to which you are adding the MCP tools: Build → Agent Builder → {Your Agent}
- Go down to the Toolset section and click "Add tool +" and click "Add from file or MCP server"
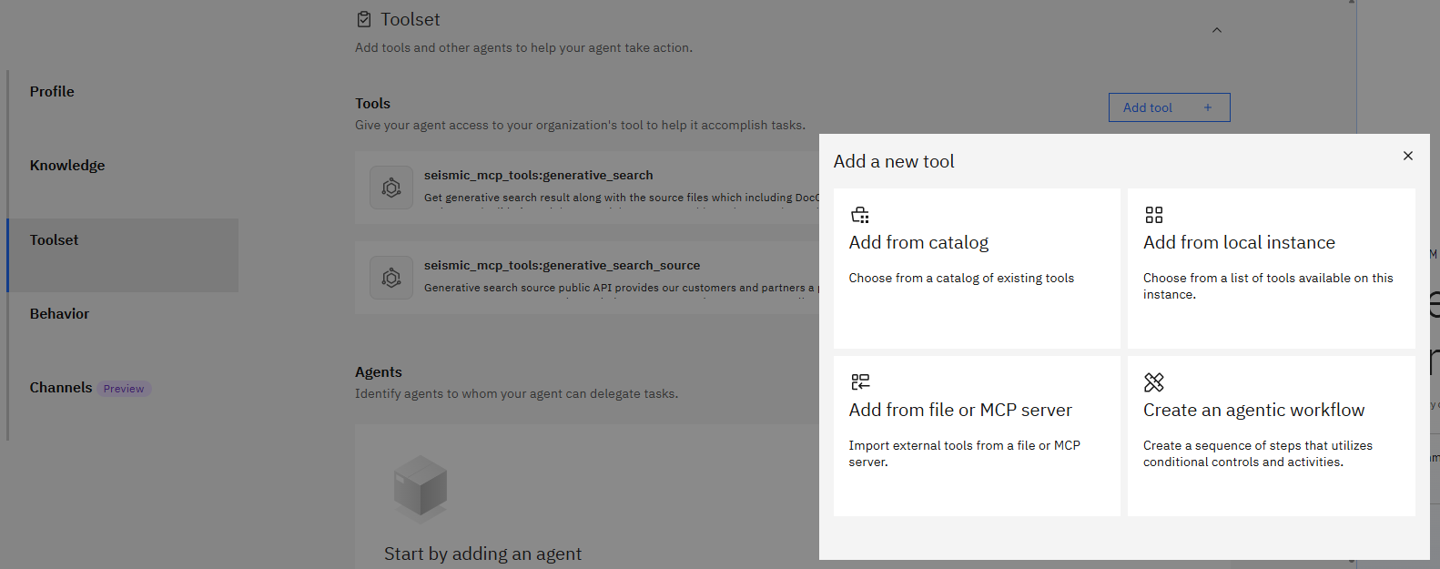
- Click "Import from MCP server" on the following pop-up to take you to the "Import or remove tools from MCP server" page.
- Select the recently added MCP server from the drop down
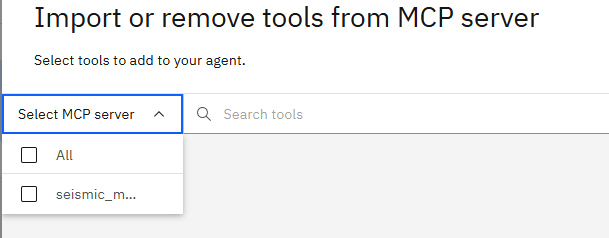
- Toggle on the tools you wish to use

Step 7: Change connection to Member credentials
Edit the connection settings for both Draft and Live to ensure they are set to "Member credentials".
Step 8: Modify agent behavior to target tool usage
- Modify the behavior instructions to direct the agent to use the tools for different types of questions.
- Test using the chat interface on the right side of the screen.
Updated 2 months ago