
How to connect to Seismic's Remote MCP Server to Claude
This guide explains how developers can connect their Claude desktop agent to the Seismic MCP Server. This MCP setup enables secure authentication through Seismic and provides access to tools such as Generative Search for building AI-powered experiences.
Prerequisite - AuraIt is currently required to have Seismic Aura to access the tools and features within our MCP server
A published Claude connector is also availableSeismic publishes an official Claude connector in the Claude Directory and Seismic Exchange. It installs in a few clicks with no OAuth setup, and it currently exposes a curated subset of tools: Generative Search and LiveSend link generation only. If that covers your use case, it is the quickest path. Follow the published connector install guide instead of this page.
The custom connector described below exposes the full Seismic tool set, including meetings, DSR, and CRM tools, and picks up newly published tools automatically without reinstalling. Continue with this guide if you want the complete capability surface.
Step 1: Create an App in Seismic App Registry
- Sign in to apps.seismic.com with your Seismic account.
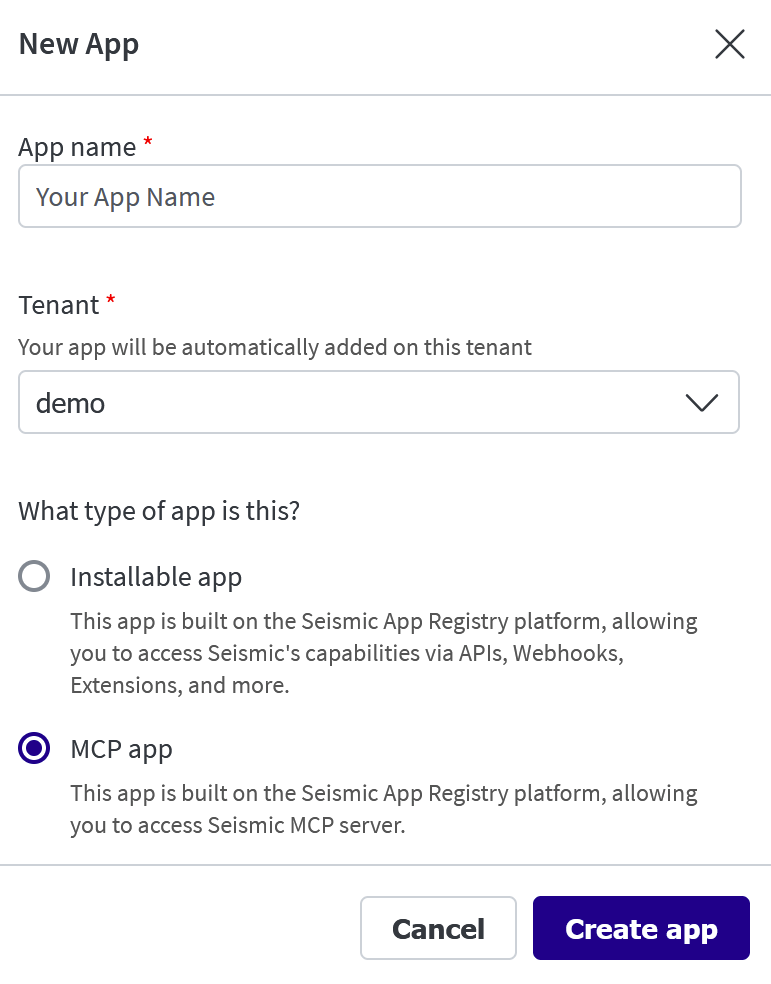
- Click on Create App button.
- Enter the App Name, Select MCP app as type click Create app.
Step 2: Configure OAuth Client (Auth Code + PKCE)
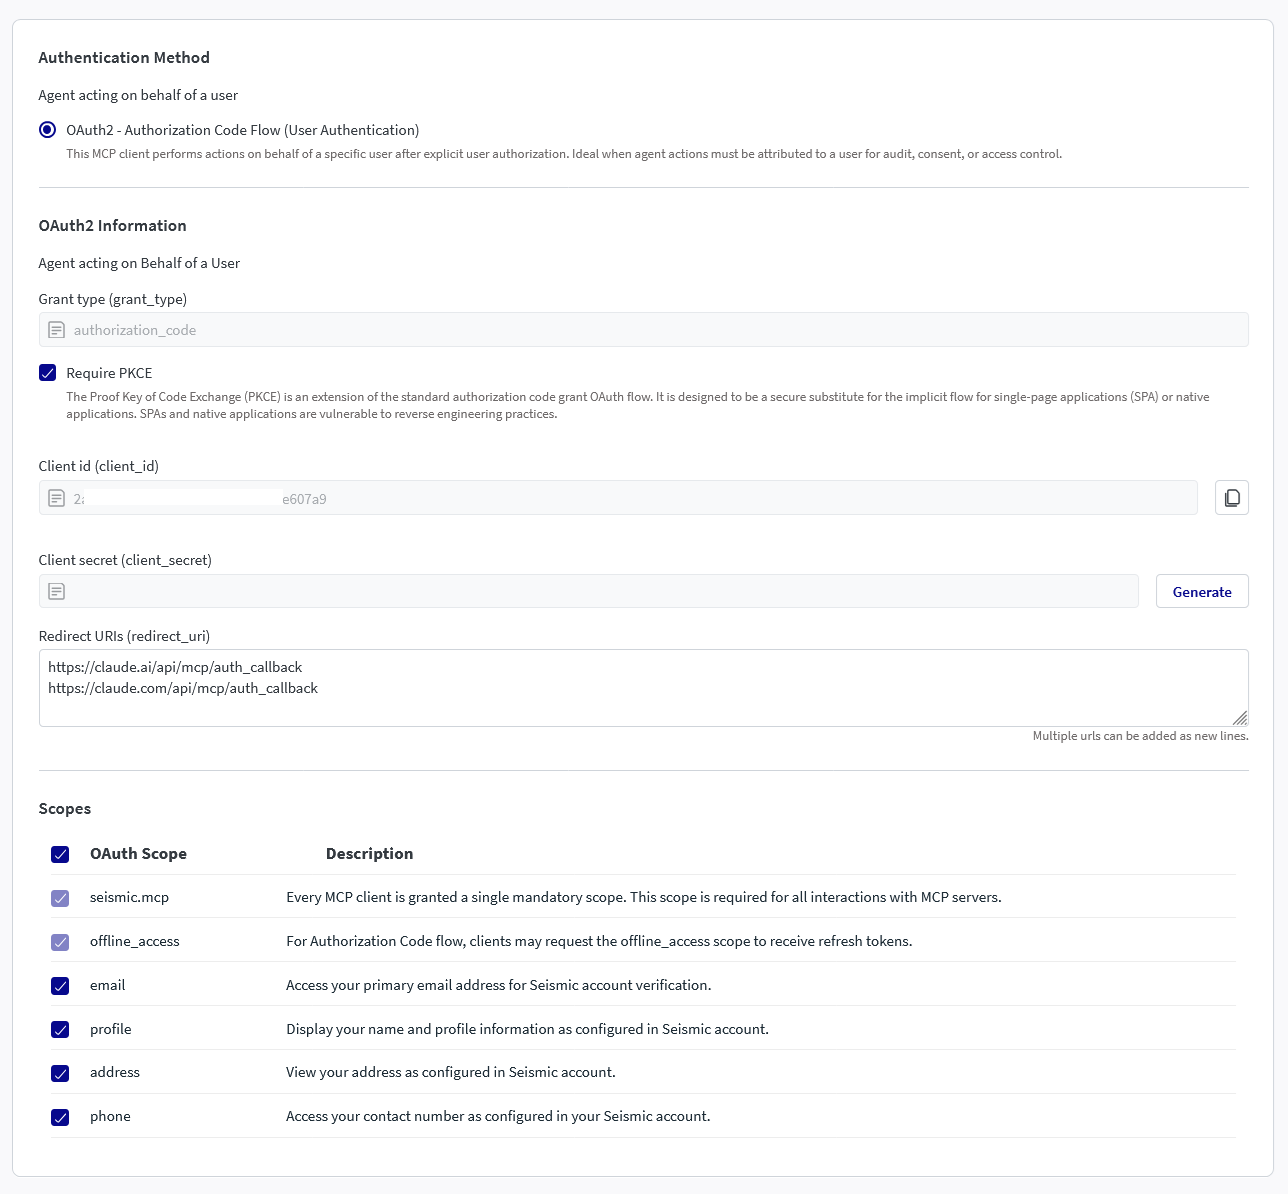
- Turn on Authentication and select OAuth2 - Authorization Code Flow
- Enable Require PKCE. Claude uses PKCE, so leave the client secret blank. Do not generate one.
- Enter the following redirection URIs
https://claude.com/api/mcp/auth_callback
https://claude.ai/api/mcp/auth_callback- Pick the scopes needed to access MCP Tools.
- seismic.mcp is selected by default.
Step 3: Enable the App
Find the app in your tenant and enable it.
- Go to
System Settings→My Apps - Open your app and enable it.
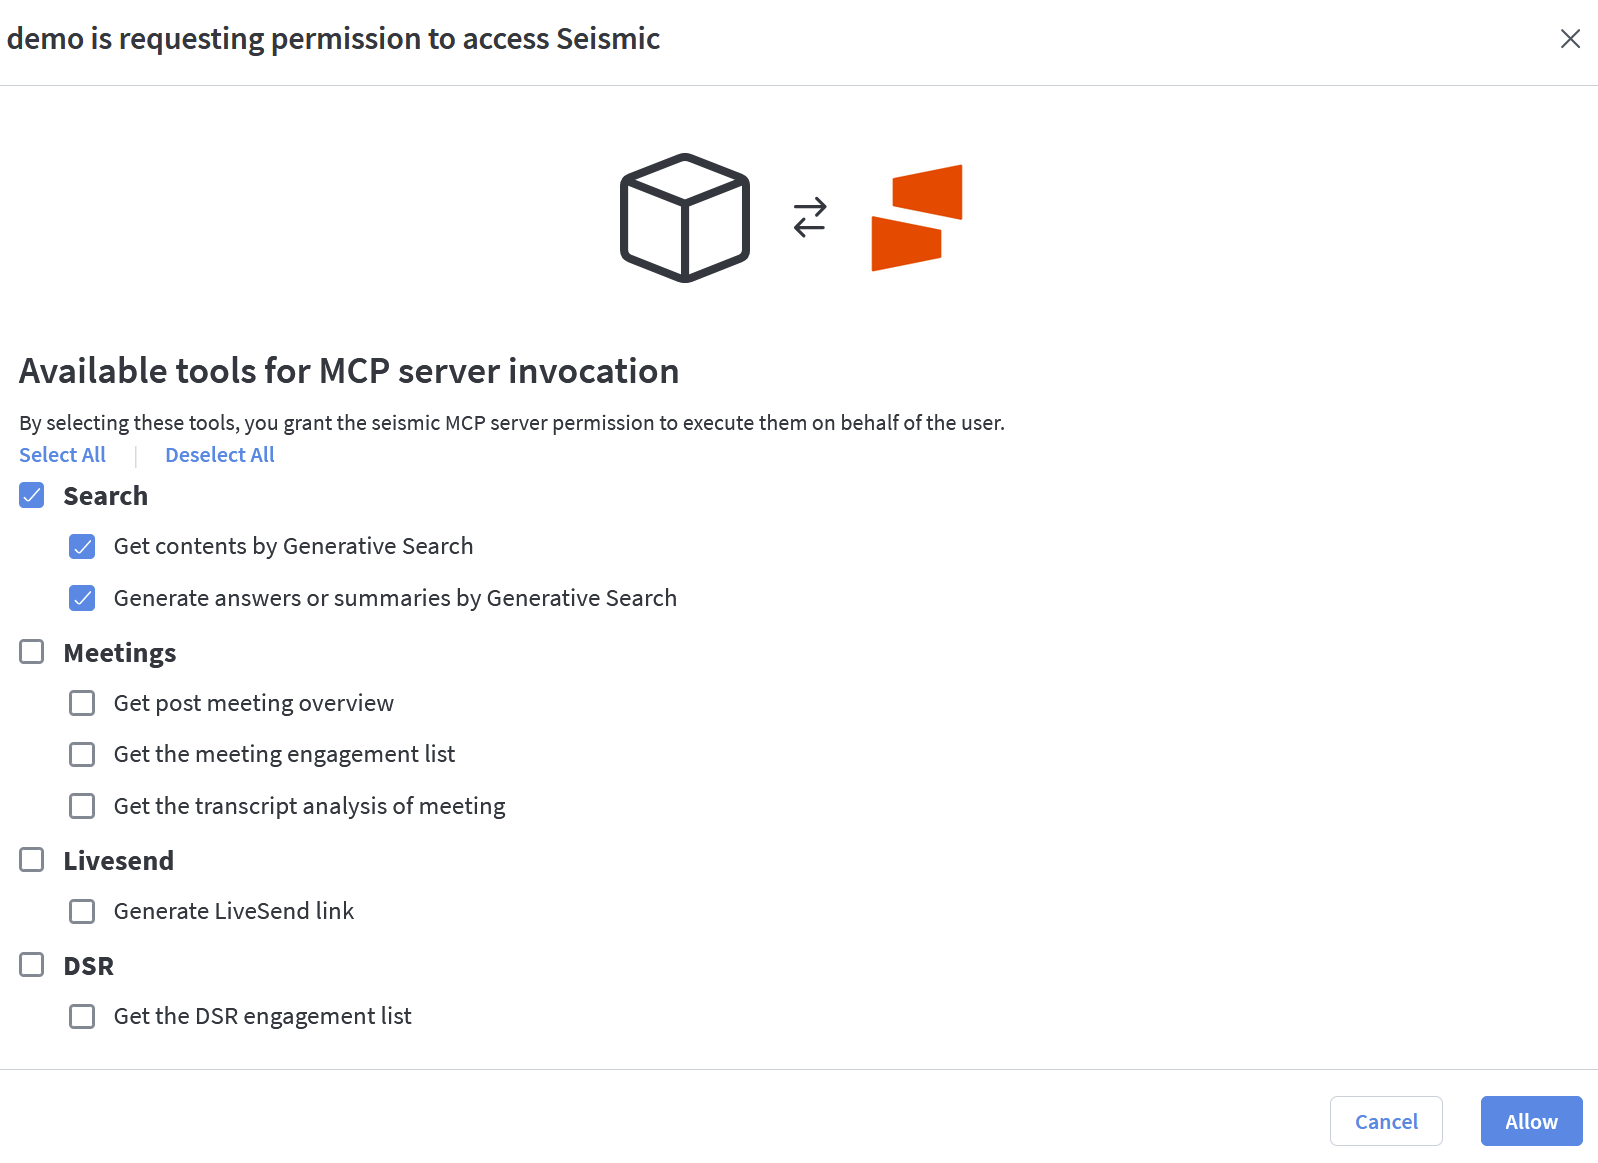
(Optional) To share the app with another tenant:
- Copy the Distribution / Install Link from the app page.
- Provide this link to admins of other Seismic tenants so they can install it in their own tenant.
Step 4: Create a custom connector in Claude
- Go to Claude Admin Settings -> Connectors (https://claude.ai/admin-settings/connectors)
- Create a new connector with these settings:
- Name: Seismic MCP
- Remote MCP Server Url:
https://mcp.seismic.com/v1/tenants/YOUR_TENANT_NAME - OAuth Client Id: Client Id copied from App Registry
- OAuth Client Secret: Not needed for PKCE client
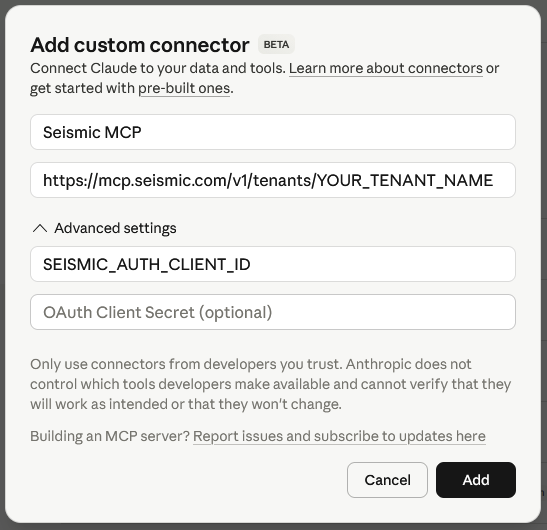
- Add your connector. This connector will be available for all users in your team.
- Switch to Personal Settings and go to connectors - https://claude.ai/settings/connectors
- Client connect.

Once connected it should show the configure button.
Edit the configuration and set all tools to always allow.
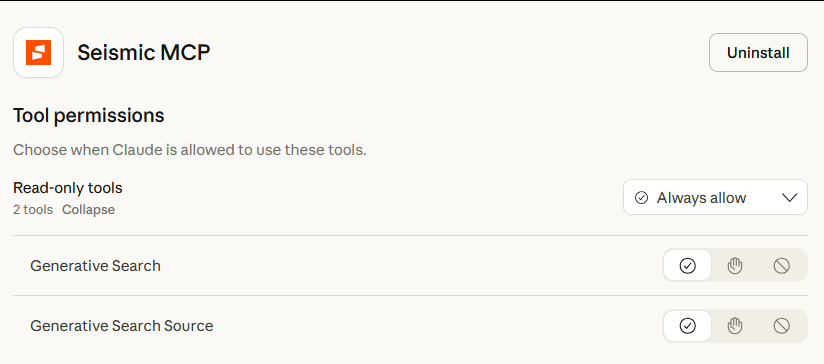
After configuration, Claude will be able to:
- Call tools exposed by the Seismic MCP Server (e.g., GenSearch)
Updated 2 months ago